5. Dynamic panels
Dynamic panels overview
Dynamic panels are containers with multiple states, and you can easily change which state is visible using interactions. This makes it easy to swap content to demonstrate functionality. In addition, here are some more things you can do with dynamic panels:
- Swap content to quickly demonstrate functionality
- Create scrollable regions
- Make widgets stick or pin to the browser
- Prototype drag and drop interactions
Adding and editing dynamic panels
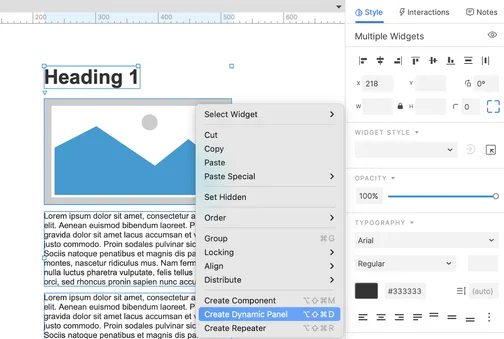
You can add a dynamic panel by dragging one from the Libraries pane or by drawing one using the option in the Main Menu (shortcut “D”). Alternatively, you can right-click a widget (or multiple selected widgets) on the canvas and select Create Dynamic Panel from the context menu.

To edit a dynamic panel, double-click it on the canvas. Once the dynamic panel state is open, you can add widgets to the state as usual. A floating bar will appear so you can add and change the state that is being edited. You can also click View All to see and edit the states side-by-side.
Follow these steps to try adding and editing a dynamic panel.
- Drag a Dynamic Panel onto the canvas from the Libraries pane.
- Double-click the panel to edit State 1.
- Drag any widget from the library and drop it into State 1.
- In the floating bar above the panel, click the State dropdown. Then click + Add State. You are now editing State 2.

- Drag a different widget from the library and drop it into State 2.
- In the floating bar, click View All and try editing the widgets in each state. Then, click the back arrow at the top-left to return to the canvas or double-click outside of the states.


Interacting with dynamic panels
Dynamic panels can be hidden, moved, resized, and other actions just like other widgets. But you can also use the Set Panel State action on a dynamic panel to change the current visible state in your prototype.

Starting from the panel you created above, follow these steps to try changing the panel state.
- Drag a button widget onto the canvas with your panel.
- Click New Interaction in the Interactions pane.
- Choose Click or Tap, and then select the Set Panel State action, and choose the dynamic panel from the target dropdown list.
- In the State dropdown list, select the Next Option. Then, select the Wrap from last to first checkbox, and click OK.
- Preview the page and test out the interaction.
Create a scrolling region
Another common use of dynamic panels is to create scrolling regions within the page. Follow the steps below to try converting widgets to a dynamic panel and making them scroll.
- Add a new page in the Pages pane.
- Drag a Heading 1 widget onto the canvas from the Libraries pane.
- Place an image widget and three paragraph widgets below the heading.
- Select all of the widgets, right-click, and select Create Dynamic Panel in the context menu.
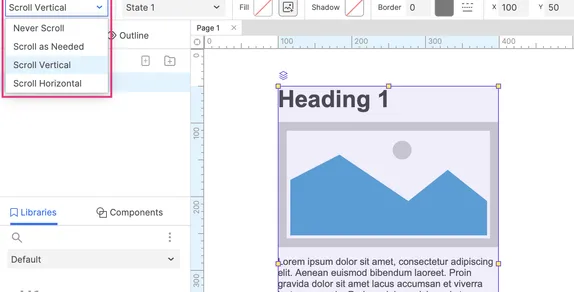
- Change the dynamic panel’s height to around 300 so some of the paragraph widgets are cut off.
- With the dynamic panel selected, select Scroll Vertical in the scrolling dropdown in the Style toolbar or the Style pane.
- Preview to try it out.


For more advanced learning, check out these additional tutorials for Dynamic Panels:
Next up, learn how to share your prototypes.