Getting the Most Out of the Figma Plugin

If you haven't downloaded the Axure for Figma Plugin, click here!
Here at Axure, we understand that many of you use a variety of design tools across your organization. With the Axure for Figma plugin that we unveiled in 2020, transforming your Figma files into rich, interactive prototypes is a breeze. If you're a Figma user who's looking to combine your design assets from Figma with Axure's powerful and interactive prototyping capabilities, check out these tips and tricks to help get you started.
How to use the Figma plugin
To use the Axure plugin for Figma to import your frames into Axure RP or Axure Cloud, follow these steps:
Axure RP:
- Install the Axure plugin for Figma.
- In Figma, select the elements you want to copy and go to Plugins → Axure → Copy Selection for RP. (You can also copy all assets with the Copy All Frames for RP option.)
- In Axure RP, paste the copied assets onto the canvas.
Axure Cloud:
- Download and install the Axure Cloud desktop app.
- Install the Axure plugin for Figma.
- In Figma, select the frames you want to publish to Axure Cloud and go to Plugins → Axure → Export selection to Axure Cloud.
- Select the workspace and project you want to publish your Figma assets to or select Create New Project in the Project dropdown.
- Click Upload to publish your Figma assets.
Bringing more realism to UI designs
Copying frames from Figma to Axure RP lets you quickly bring your designs to life with the powerful prototyping capabilities of Axure RP, allowing you to add more realism and interactivity to your designs. This can range from simply having a text field that is functional and allows users to type into it, to creating highly-interactive, realistic prototypes filled with complex interactions and conditional logic. Additionally, since the plugin imports your designs as separate layers (as opposed to pasting each frame as a single image), adding interactivity or style effects to specific elements is easier than ever.
Math expressions
One way you can enhance the designs you created in Figma and take them to the next level in Axure RP is with the use of math expressions. By using mathematical expressions when building interactions, you can create more dynamic and interactive prototypes that can respond to user input, and you can dynamically generate text and numeric values based on calculations. For instance, you can do things like calculate the purchase total for a shopping cart in a check-out form, dynamically set text, or display the current date or time. The great part about using expressions in Axure RP is that they're easy to add when building an interaction to your existing designs. To include an expression in one of your interactions, simply write your desired math expression into any field that has an fx icon next to it, such as the Value field that is common in many interactions. Then, all you have to do is ensure that the formula is contained within the double brackets [[ ]].

Form fields
Another way you can build upon your Figma frames in Axure RP is to create working form fields. Let's say you have a Figma design of a sign up and login screen that you want to add interactivity to, in order to better capture the user workflow. Form widgets in Axure RP, such as text field widgets automatically allow users to type into them when viewing the prototype in the browser. Once you bring your Figma frames of a form (such as a login form) into Axure, you can also take steps such as building interactions on the submit button to successfully take users to the next page based on what they type into each field, which this tutorial outlines. Additionally, you can add realistic style effects, such as the Error style effect, and then add conditional logic to the button's interaction so that it automatically displays the error state when the user doesn't complete a field, or enters the wrong credentials.
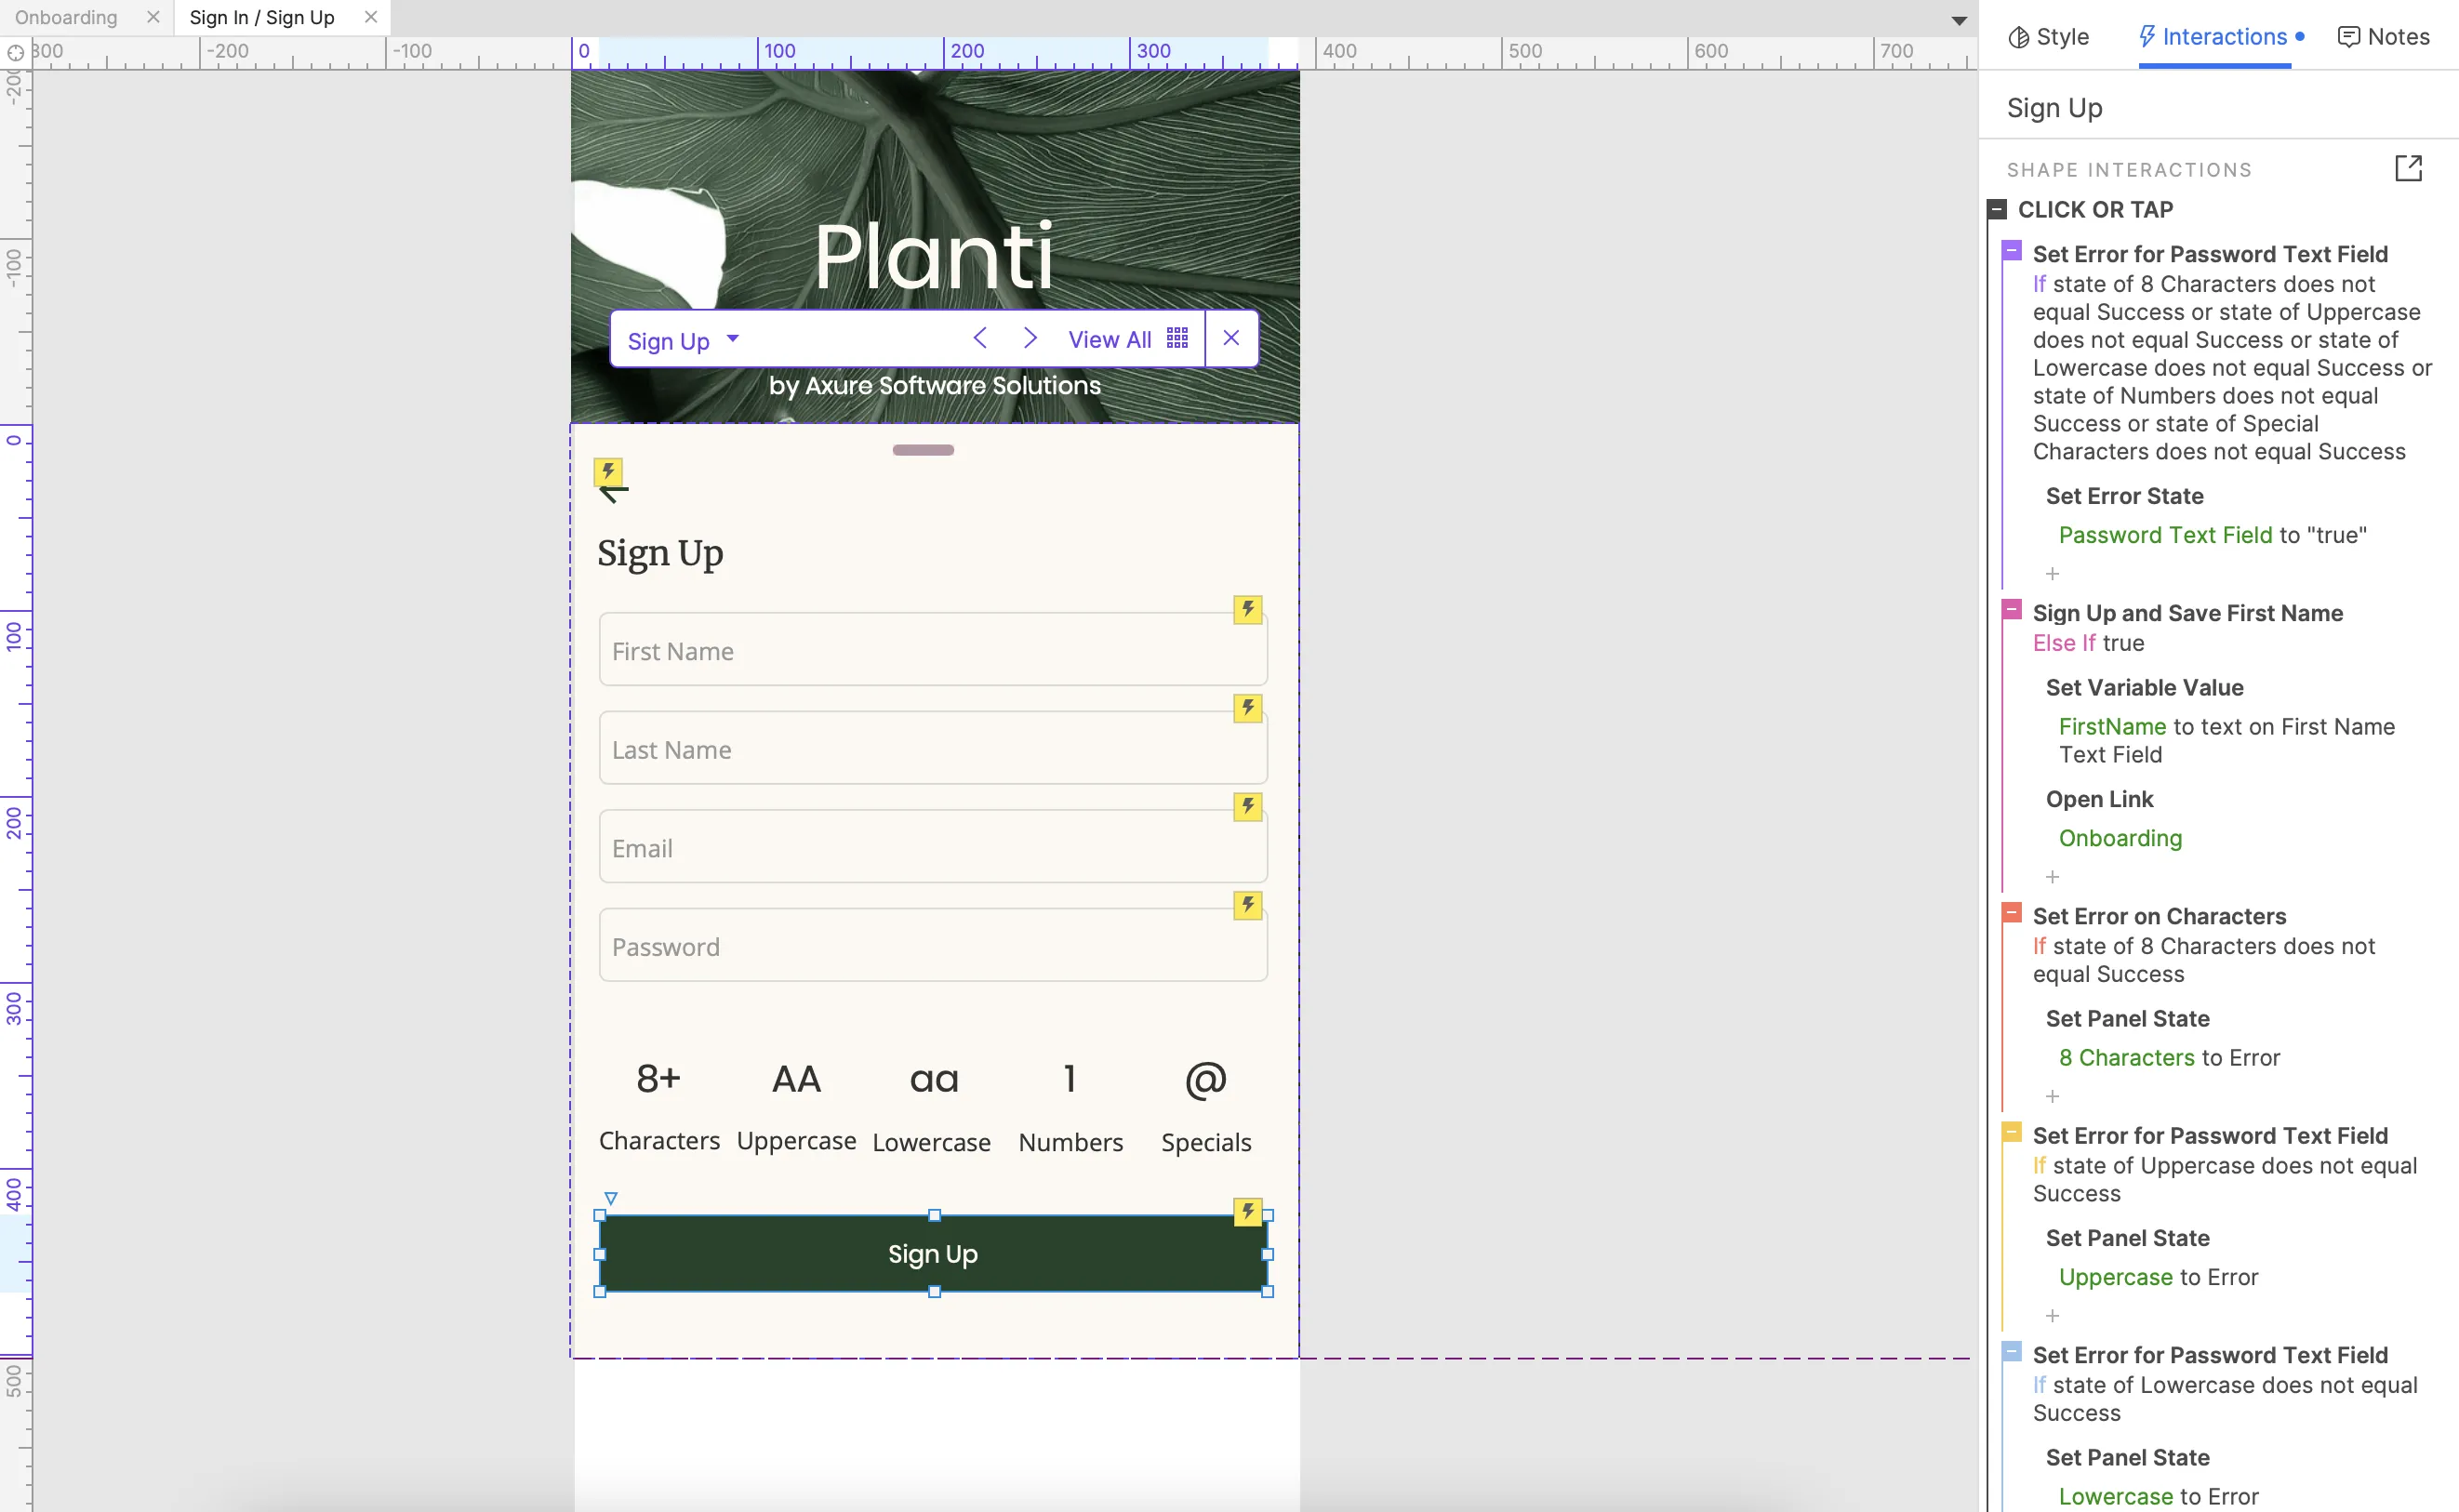
A sign up or login screen is just one of many examples that demonstrates how adding interactivity to your designs creates more realism. The more realistic your prototypes, the better you can conceptualize the workflow, which comes in handy when presenting to stakeholders or conducting user testing.
How else can you make the most out of the Figma plugin?
When working with multiple design tools, staying organized can be tough. That's why in addition to bringing your Figma frames into Axure RP, you can also export your frames into Axure Cloud keeping everything organized into a single, shareable link. If you don't need to add complex interactions to your Figma designs in Axure RP, exporting them to Axure Cloud still has its benefits such as the ability to inspect your designs, turn them into quick click-through prototypes, and share them with others.

We hope this deeper dive into making the most out of using both Figma and Axure helps! As always, to submit any feedback, you can contact us at support@axure.com.
Happy Prototyping!